CACANi (Computer Assisted Cel Animation) is an application developed with hand drawn animators in mind. With our proprietary tools and workflow, CACANi helps reduce the work required by generating in-between frames based on the key frames and automatically painting the frames, creating a smooth and realistic animation sequences in a fraction of the time.
Since version 1, we have learnt a lot about what makes CACANi useful to animators. With that knowledge, a lot of work has been done to increase performance and improve the different tools that you use. Whether you’re a new user or an existing expert of CACANi, we have something for you.
Auto generate animation drawings.
Create inbetween drawings from your key frames
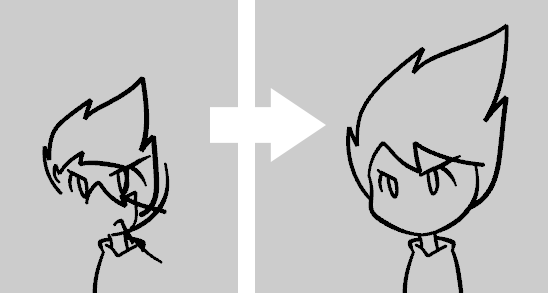
A fantastic new tool in your animation arsenal, CACANi allows you to automatically generate inbetween drawings from the key frames you drew inside the software. You can set any number of inbetween frames you want, like that slow motion shot that would have taken you ages to complete.
There are also numerous options to allow you to adjust the timing and spacing with the Timing Panel, inbetween only selected strokes, and even check the inbetween animation instantly as you draw the key frames, by using our Quick Flip feature.
Customize the generated animation
There will be many instances where auto generation does not give you the desired results. We understand that.
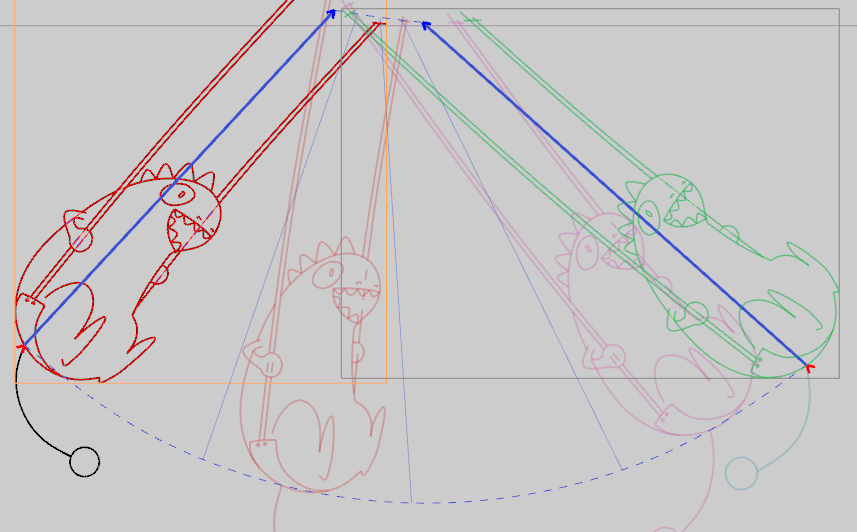
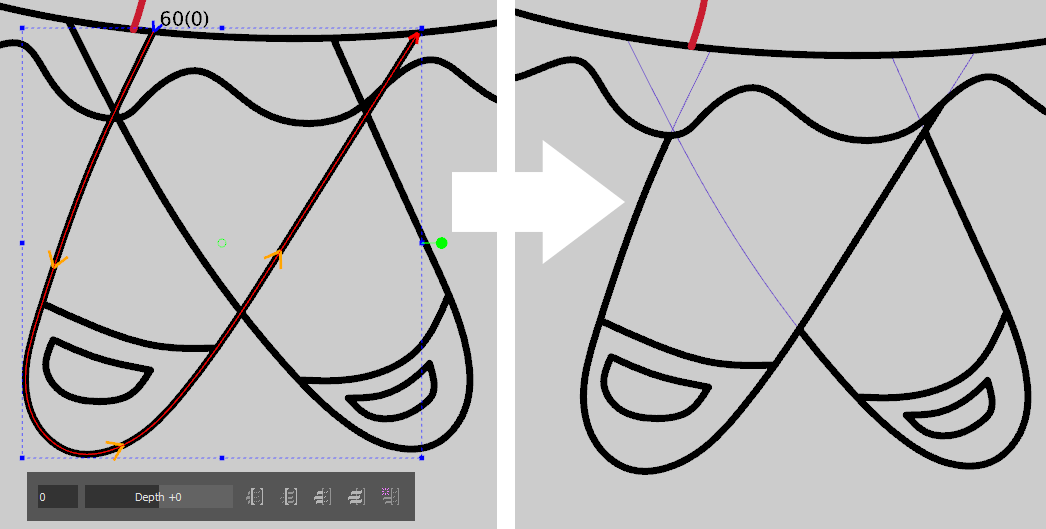
Which is why we have tools for you to modify the generated frames to fit your needs. The Feature Point Tool provides fine-grain controls of how a stroke is generated, while the Bone Tool gives you the ability to tweak the trajectories of stroke groups. Stroke Masks allow you to hide sections of drawings even before you start painting the regions.
New in 2.0! Better animation generation, stroke matching
Using Re-match Stroke Order, you can now make corrections to fix stroke matching problems between keyframes. You can also now combine strokes together with the Join Strokes option.
With the Auto Feature Points mode, you can automatically assign feature points to the ends and sharp corners of each stroke after drawing it. This can improve the inbetweening result. You can also overlap the feature points’ motion paths, allowing you to create inbetweening motion that looks more natural.
New in 2.0! Occlusion and segment hiding
When drawing overlapping elements, you may have to spend extra time to hide sections frame by frame. The new Boundary Stroke and Occluded Stroke options let you reduce this manual work. Designate a stroke as a boundary stroke to hide or reveal stroke segments automatically across multiple frames, all without having to grapple with layers.
Also, other than masks, the new Create Clipping Mask option will allow you to hide strokes outside of a region.
Your personal drawing assistant.
Drawing Tools for Maximum Artist Control
The process of making animation drawings is a key focus of CACANi. You’d be surprised how our Accurate Smooth feature makes freehand vector drawing easy, giving you that smooth, pressure-sensitive stroke on your first try. For further control and more precise line drawing, the Curve Tools allow you to make sub-pixel-perfect strokes.
Use the different Invisible, Hidden and Color Separation stroke types in a single layer to make your animation drawings understandable for yourself and your team.
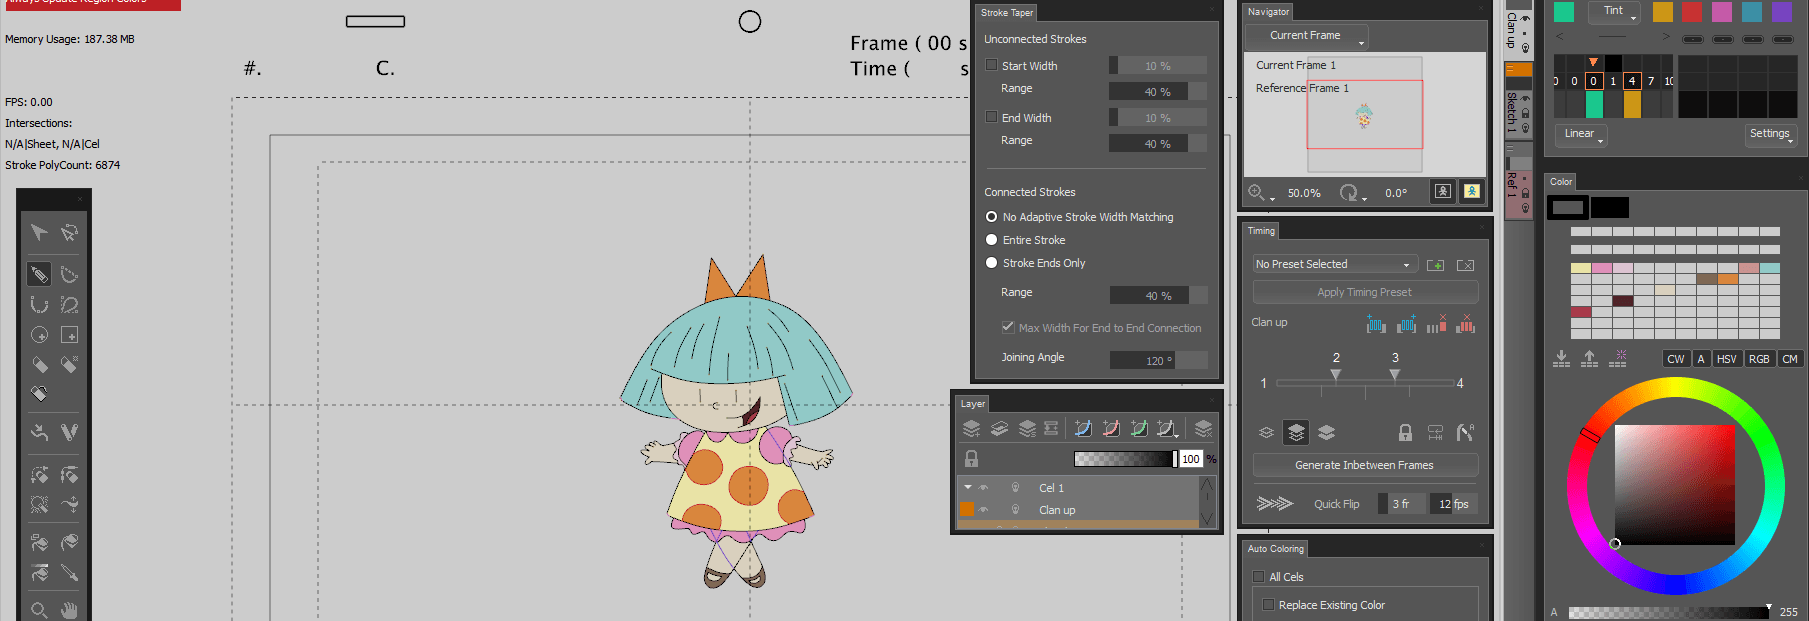
New in 2.0! Adaptive Stroke Width Adjustments
Thinning and thickening the stroke width of your drawings, when you’re drawing them and after you’ve drawn them, are both now much easier with the Stroke Taper Panel and Change Stroke Width option. Stroke widths will also adjust themselves automatically when edited.


New in 2.0! Better UI, Shortcut Customization
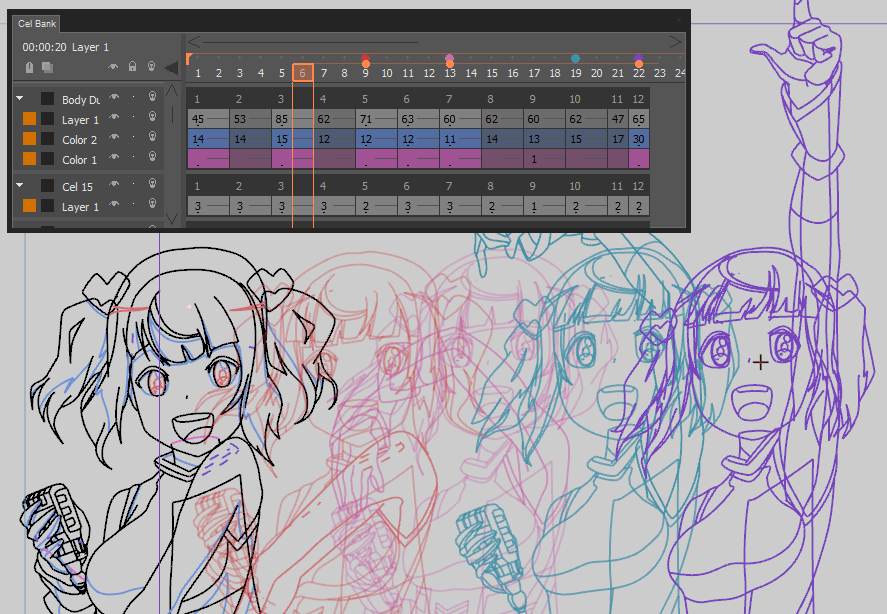
The menus and user interface have been improved and reorganized so that you can select more options, but not increase the onscreen clutter. The Timing, Onionskin (previously Lightbox), Navigator and Cel Bank Panels have seen more drastic changes in the functions and user interface, while the other panels have smaller cosmetic changes.
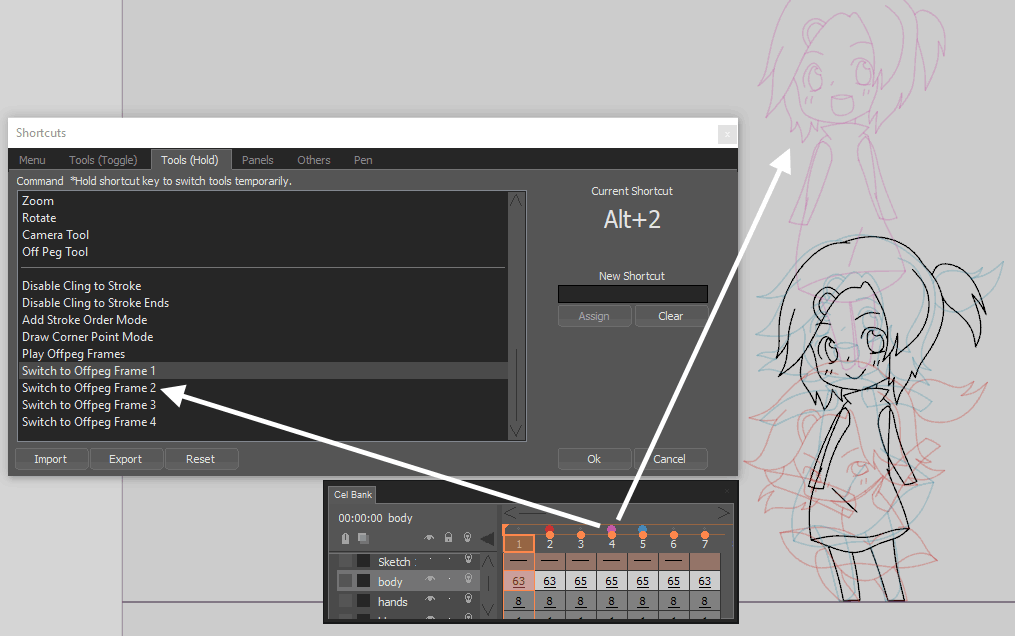
The Customize Shortcut window has been reorganized for greater clarity when assigning shortcut keys. An additional section to configure the digital stylus buttons has also been added.
New in 2.0! Performance Improvements
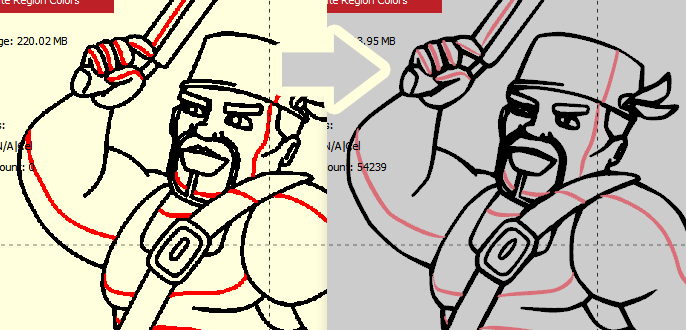
Many of the underlying functions relating to the handling of strokes and color regions have been rewritten. As a result, CACANi’s ability to handle complex drawings (More than 1000 strokes per frame) have been sped up and stabilised, while memory usage has decreased.
When working with particularly detailed drawings, a new option, Always Update Region Colors, can be turned off to further speed up the drawing response.
A virtual animator desk. And more.
Layer Features Made for Animators
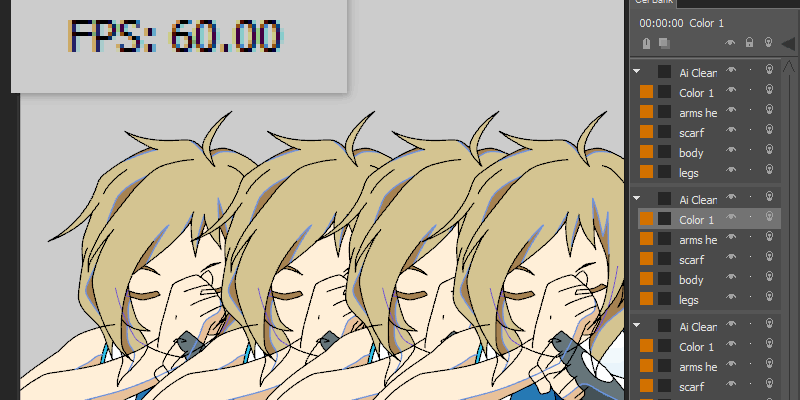
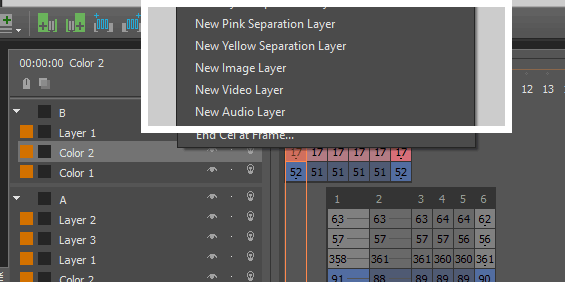
The Cel Bank is your limitless paper drawer. On top of drawing frame by frame, you can also choose Color Separation Layers to draw your shadow or highlight lines.
Load external files into CACANi using the Image and Audio Layers as references for your animations.
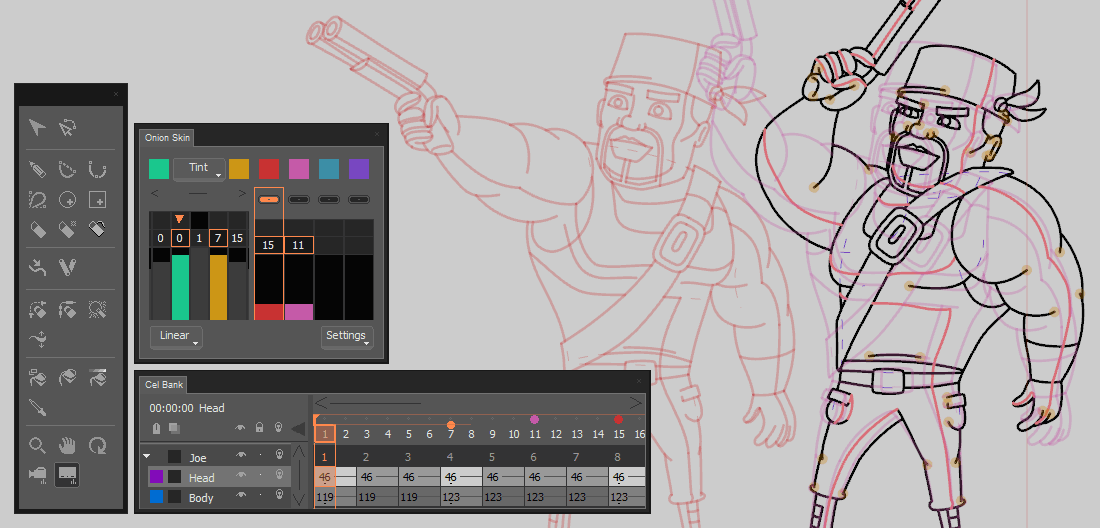
Onionskin and Offpeg Adjustments
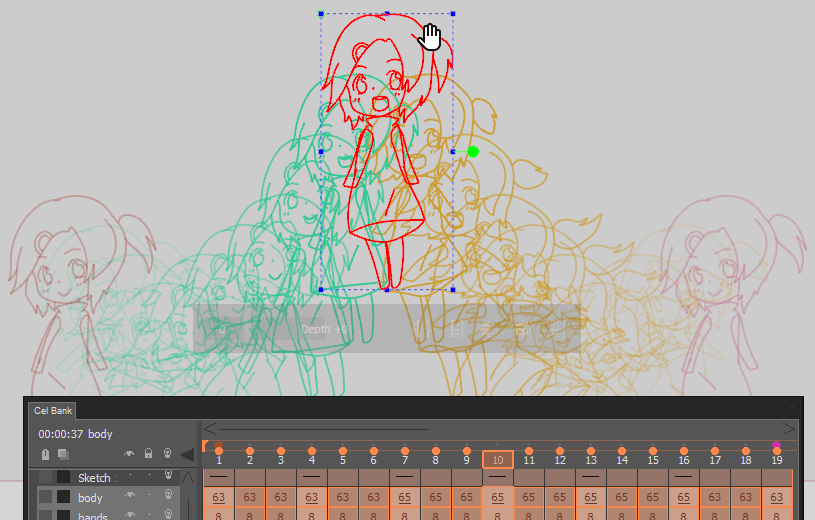
The Onion Skin Panel allows you to check your animation frames as you draw them, so that you can maintain consistency between the drawings.
The Offpeg Tool further lets you shift the onionskin images so that you can line up the frames temporarily and get tighter line control.
New in 2.0! Raster and Video Layers
The new Raster Layers allow you to draw and edit drawings in a traditional pixel-based manner. Color Separation Sub-layers also help you to draw highlight and shadow regions without affecting your main line art.
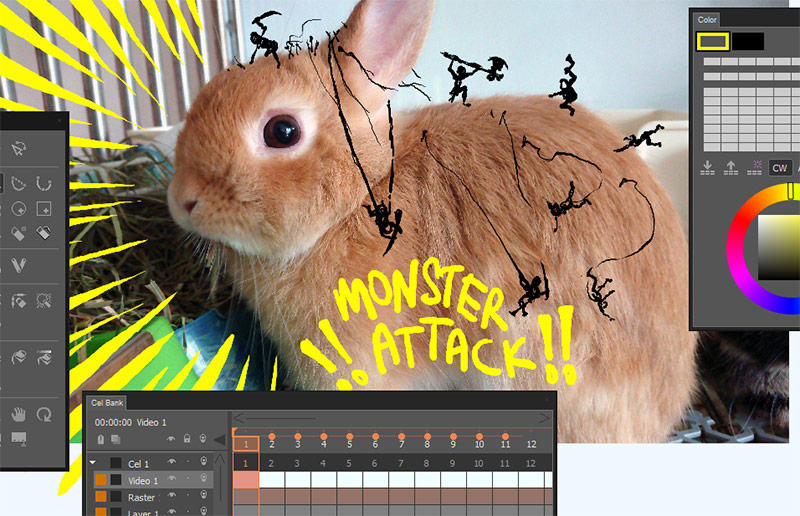
In addition, you can now load, view and edit video frames with Video Layers. You can also speed up layer adjustments with the Start Cel and End Cel options.
Audio layers are now like regular cels and are movable as well.
New in 2.0! Convert Raster Line Art
Using Rasterize Image Layer, you can now turn video frames and external images into CACANi raster layers for further editing. You can also turn raster line art into CACANi vector strokes with the Extract Line Art and Vectorize Layer options.
New in 2.0! Editing across Multiple Cels and Frames
You can now use selected functions across multiple frames or cels. You can also use the Select All Frames option from the context menu or configure it with a shortcut key.
Tools and functions that support multiple cel or frame editing include the Selection Tool and the Apply Stroke Tapering, Change Stroke Width, Randomize Strokes, Transfer / Replace Grouping Info, Transfer Boundary Stroke Settings and the various frames editing and frame type conversion options.
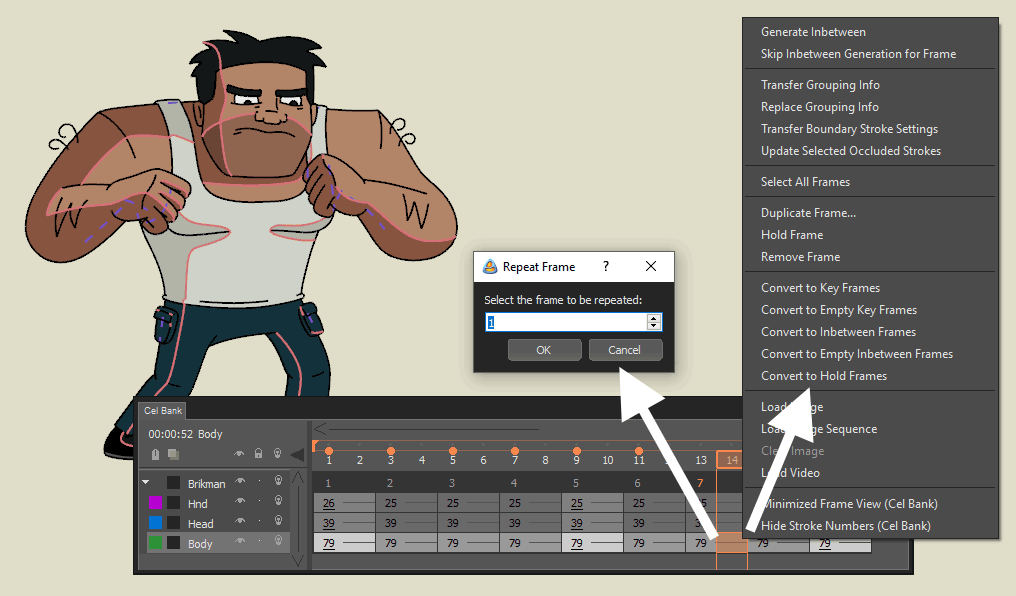
New in 2.0! New Frame Types and Frame Type Conversions
You can now use Repeat Frames to display a frame again anywhere in the Cel Bank without increasing memory use. You now also have a lot more flexibility in converting between the different types of frames. Finally, much care has also been taken to ensure that after your conversions, the timings in the Timing Panel are not affected.
New in 2.0! Switch Quickly between Onionskin Frames
After assigning Offpeg frames, you can toggle between displaying your active frame and the offpeg frames quickly using shortcut keys.
Clean up your drawings in a jiffy.
Auto Cling and Clean Up Tool, get those ends fixed, fast
Save some editing time! With the Cling options, as you make your drawings, you can set the stroke ends to be automatically joined to other nearby strokes for a cleaner style. It is also very helpful for painting later.
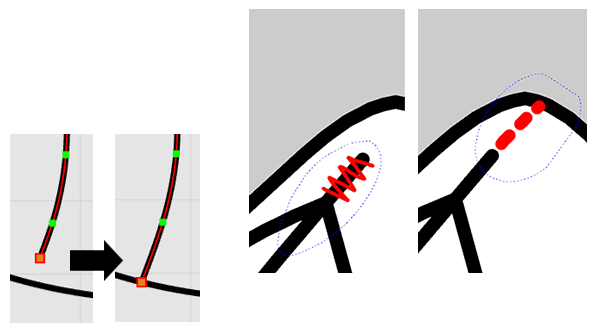
We also know that artists do simple tasks like extending (gap closing) or truncating stroke ends very often. That is why we unify the 2 actions into a single Clean Up Tool, so that you do not have to waste time switching tools.
New in 2.0! Speeding Up Gap Closing
You can now perform gap closing using different methods, including painting regions and closing gaps at the same time.
In addition, you can now use the Add Points When Clinging option when drawing, or the Add Stroke Connection Points option after drawing, to help you scale and rotate strokes without creating more gaps.

DIY express painting services.
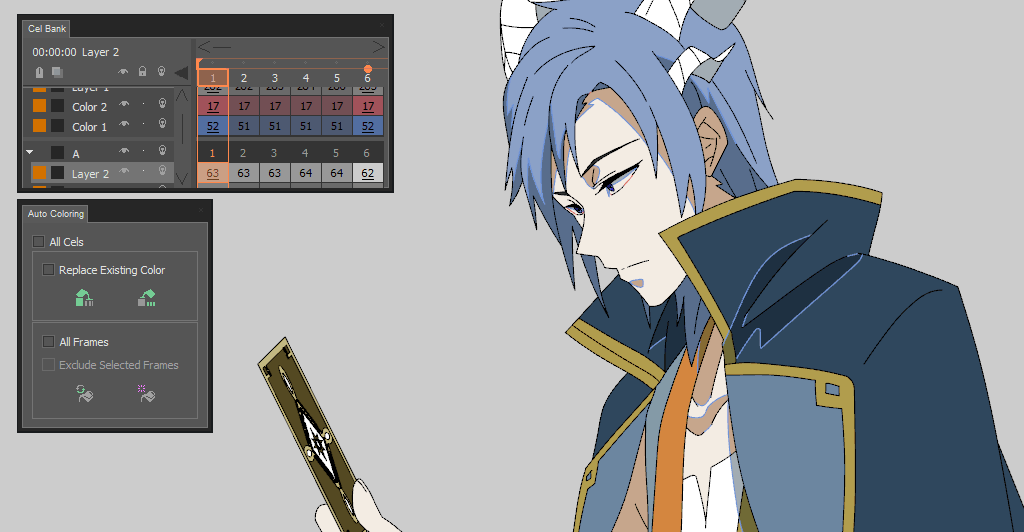
Auto Paint your Frames
Reduce the time spent painting your drawings! When your drawings are generated with CACANi’s inbetweening features, you can also make use of the same data to auto color them. Paint the frames all at once, or paint a selection as you check through the frames.
New in 2.0! Load and Save Color Palettes
Color Palettes can now be easily reused. Save them as .csf files and reload them in new work files.

We work well with others too.
Import and Export Options
Users can load common image formats (BMP / JPG / PNG / TGA / TIFF) into CACANi as reference image or image sequences. We also support the SVG vector format if you need to edit some logo or illustration. Audio support is available too (limited to WAV format).
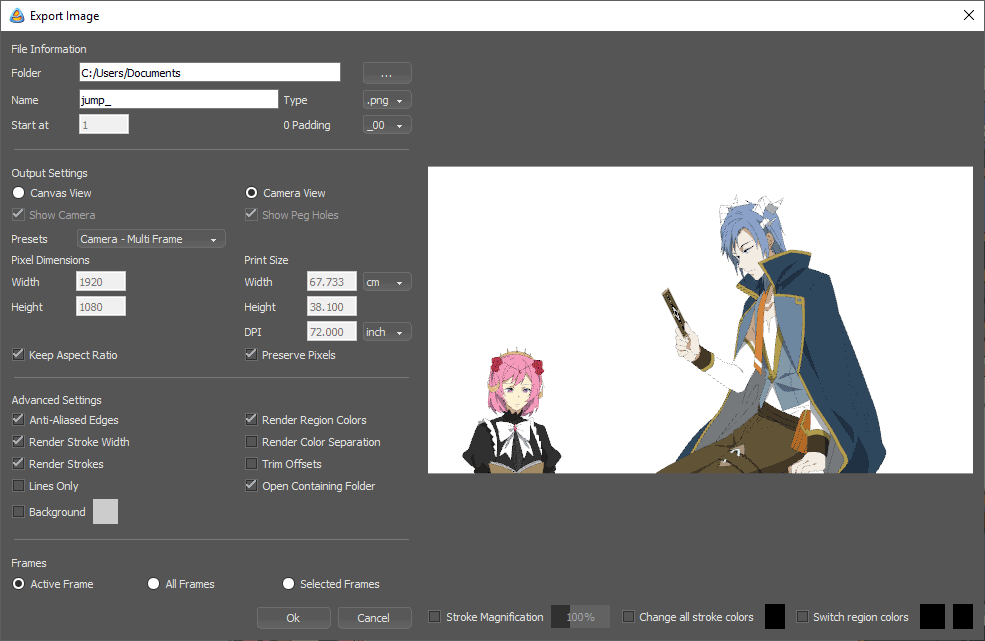
CACANi lets you export your completed drawings as image sequences, GIFs or video formats (AVI / MP4 / MP4). There’re also export settings to customize the exported information.
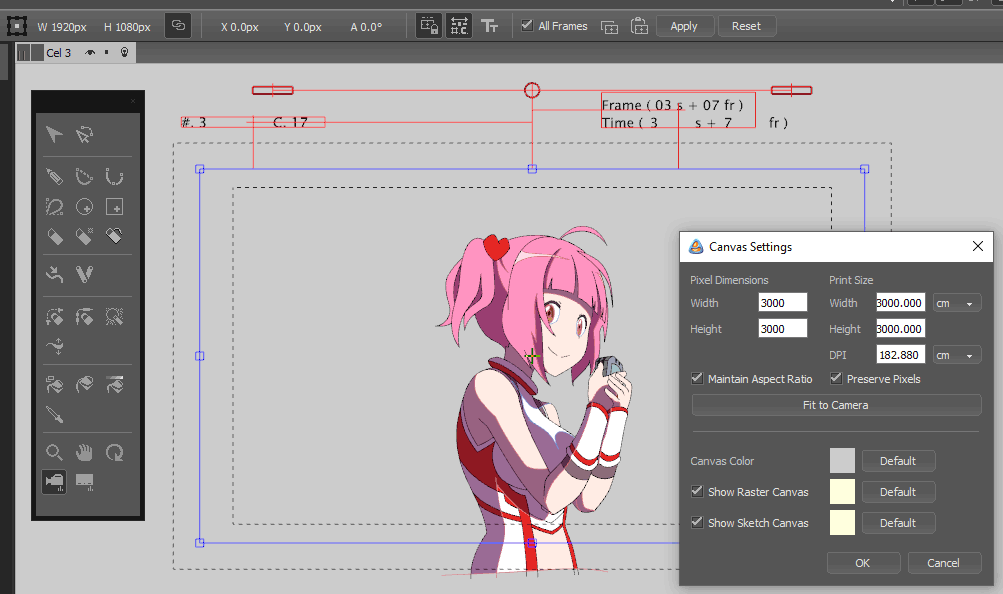
New in 2.0! Canvas, Camera and Export Settings
You can now configure the Print Size as well as the DPI of the canvas. The Animation Information section allows you to include details about your animation in the drawings. The size can be further adjusted using the Camera Tool. These information and peg holes can be exported along with the individual drawings.
You can export transparent video as well now, using the MOV video container format. Besides image sequences, this is another alternative that preserves maximum video quality for further video editing or compositing in other software.
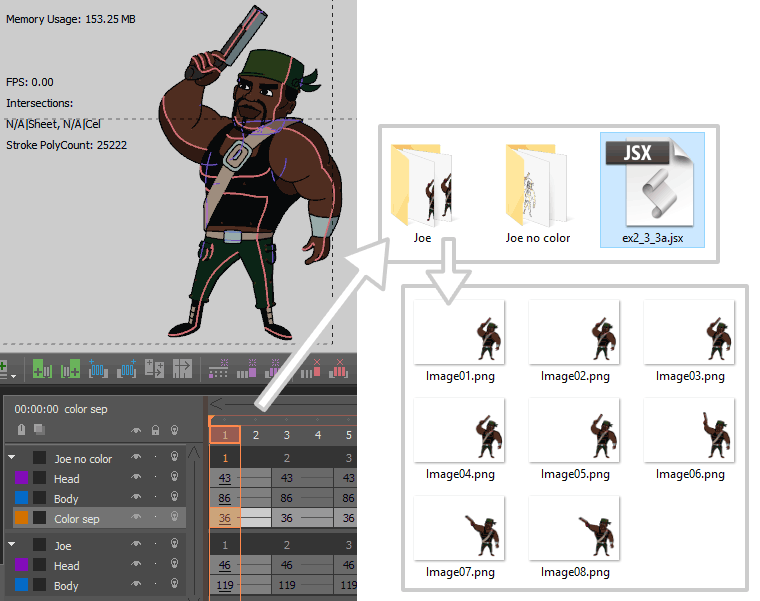
New in 2.0! Export to After Effects®
You can now export the layers as individual images, as well as export the layers and frames information to Adobe® After Effects®. By loading the JSX file within the compositing software, you can retain the layers and frames structure from CACANi and move smoothly into your post-production workflow.